

As one of the most handled and exposed parts of the entire computer system, the laptop keyboard has a lot of dust, dirt, crumbs, and even bacterial growth. Given enough time, sticky keys, keys that don’t respond, and even hardware problems can arise. Well, cleaning the keyboard is essential to improving performance and hygiene with time. Here, we will explain the different methods to clean your laptop keyboard safely and efficiently.
Abstract of Importance of Clean Your Laptop Keyboard
Your laptop keyboard can bring about many problems if it is dirty:
- Impaired Performance: Sticky or unresponsive keys will hamper your typing speed.
- Health Issues: Keyboards are a breeding ground for bacteria and germs that may lead to the common cold and flu.
- Looks: An accumulation of dust or grease on a keyboard is unpleasant to look at.
- Potential Damage: The debris will gather under the keys and lead to mechanical failures.
With regular clean, you can give your laptop keyboard a long life, smooth functionality, and a neat appearance.
Precautions Before Cleaning
Before clean the laptop keyboard, measures should be taken to prevent any harm.
- Switch Off and Unplug Your Laptop: This makes sure that keystrokes won’t be registered on the laptop accidentally, and also avoids causing any electrical damage.
- Remove Other Devices: Please remove if you are using, an external keyboard or mouse or other USB devices.
- Refer to the Manufacturer’s Instructions: Some laptop models have very delicate key mechanisms so Always refer to the user manual.
- Use Right Cleaning Agents: Do not apply wet clean because it may seep between the keys, damaging the inside features.
Tools Required
The following items are necessary to clean a laptop keyboard properly:
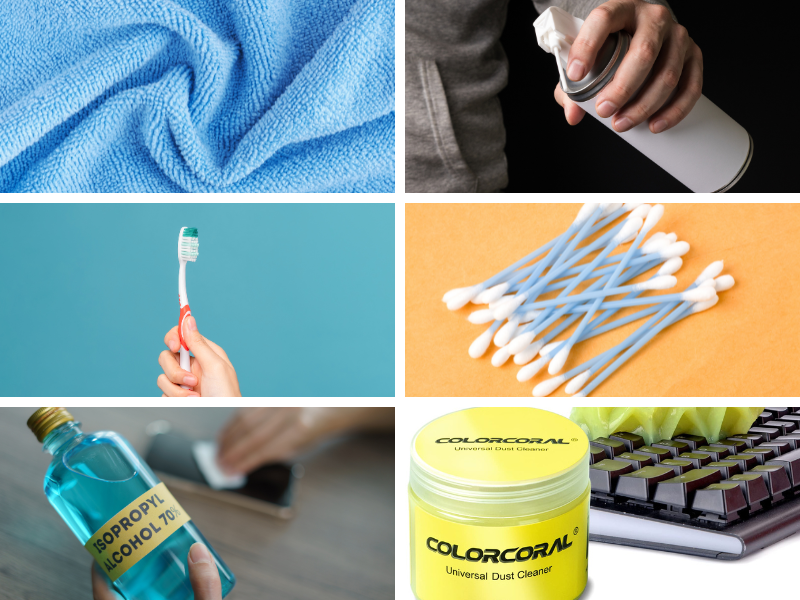
- A soft, lint-free microfiber cloth
- A can of compressed air
- A small soft brush (like an artist brush or an old toothbrush)
- Cotton swabs
- Isopropyl alcohol (70% concentration or stronger) or mild soapy water
- Sticky tape or cleaning gel
- Optional: Vacuum cleaner with a brush attachment.
Step-by-Step Cleaning Methods
Step 1: Surface Cleaning (Daily Maintenance)
The following methods can be used for cleansing on an almost daily basis:
- Using a gentle microfiber cloth, wipe the keyboard to remove dust and fingerprints.
- Use sticky tape or cleaning gel to pick up debris below and in between the keys.
- Hold the laptop upside down and shake it gently to dislodge loose crumbs and dust.
Step 2: Deep Cleaning Using Air Blower
Compressed air works well to desilt under-key dust from the keys:
- Tilt the laptop slightly.
- For a few seconds only, short bursts of compressed air should be released in the space between keys.
- Proceed from one end of the keyboard towards the opposite end to dislodge hidden debris.
- Wipe clean the surface of the keyboard with a microfiber cloth after the spraying procedure.
Step 3: Cleaning Sticky Or Greasy Keys
Keys can become sticky or greasy over time from finger oils or food. To clean:
- Dampen a microfiber cloth with isopropyl alcohol or mild soapy water.
- Gently wipe each key and areas around them.
- If dirt is stuck, dip a cotton swab in alcohol and clean around the key’s edges.
- Allow air-drying of the keyboard completely before turning the laptop on.
Step 4: Removing and Cleaning Keycaps (for Mechanical Keyboards)
Some laptop keyboards allow the removal of the keycaps for deep cleaning. If you are comfortable with that, do so in the following manner:
- Gently pry off a keycap using a small flat tool or fingernail.
- Soak the keycaps in warm soapy water for a few minutes.
- Brush or blow-clean the area underneath the keycaps.
- Let the keycaps dry completely before placing them back on.
(⚠️ Note: Not all laptop keyboards allow key removal, so be sure to check your laptop manual before attempting this.)
Step 5: Disinfecting the Keyboard
To keep your keyboard antiseptic:
- Use a disinfectant wipe or a cloth with alcohol to gently clean the keys.
- Don’t use it too wet so that liquids are damaging.
- Let it dry before you start to use the laptop.
Preventive Measures for Keyboard Hygiene
- Wash Hands To help reduce oil and dirt buildup on the keys of the laptop.
- Avoid Eating and Drinking Around the Laptop To prevent crumbs and spills on its surface.
- Use a Keyboard Cover To protect against dust and any spills from above.
- Store Your Laptop Properly In an absolutely clean and dry space when not in use.
- Schedule a Regular Cleaning Every week at least to prevent accumulations of debris.
What do you do when you spill liquid on your keyboard?
Accidents happen and if you get liquid into your laptop keyboard, the first thing is to:
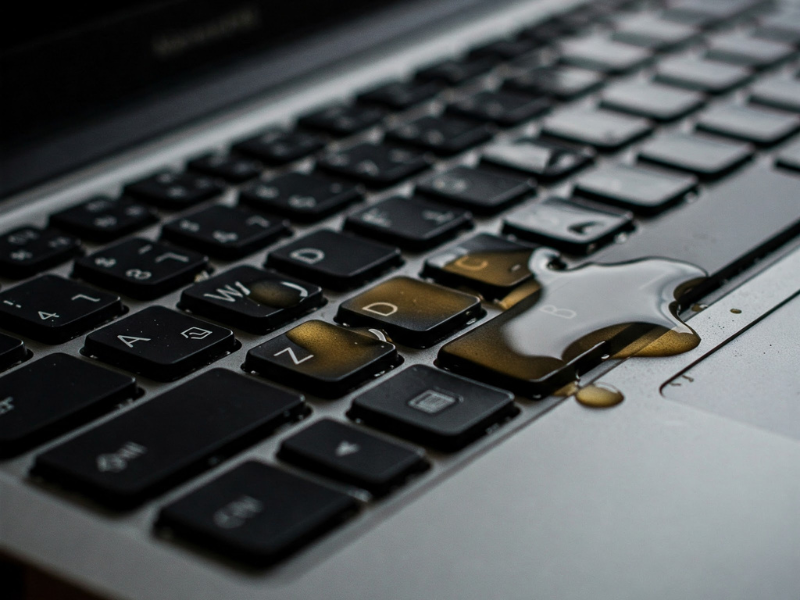
- Switch off the laptop and unplug the laptop.
- Remove any external devices and tilt the laptop upside down to drain excess liquid.
- Taking a dry cloth, absorb as much of the moisture as possible.
- Leave it under air for at least twenty-four hours before starting up.
- If any of the keys fail to respond, take the laptop to a professional repairer.
If you have cleaned your keyboard then clean your laptop screen too : read How to Clean Your Laptop Screen
Conclusion
A clean laptop keyboard directly reflects the performance, hygiene, and functional life of a laptop. These cleaning procedures and preventive measures will keep your keyboard looking spotless. Maintenance requires only a few minutes of work, but it will save you money and hard labor later.
Go on and have a clear conscience while getting down to business on your keyboard now! Happy cleaning!


One Comment on “How to Clean a Laptop Keyboard: A Step-by-Step Guide”